Official Reolink Reseller & Business Partner In South Africa
FREE SHIPPING FOR ORDERS OVER R1000
REOLINK SOLAR PANEL - V3-6W - INFORMATION, TIPS, GUIDELINES & BEST PRACTICES
PRODUCT FEATURES & INFORMATION
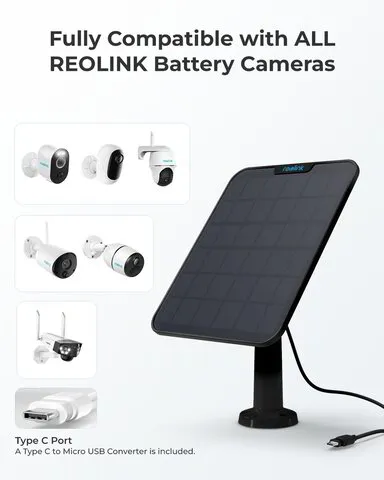
Version 3 (V3-6W) Reolink Solar Panel is specifically designed for Reolink Duo 2 & Trackmix dual lens battery cameras
Backward compatible with ALL Reolink battery cameras (Type C & Type B connectors) as a Type C to Type B micro USB adapter is included in the box.
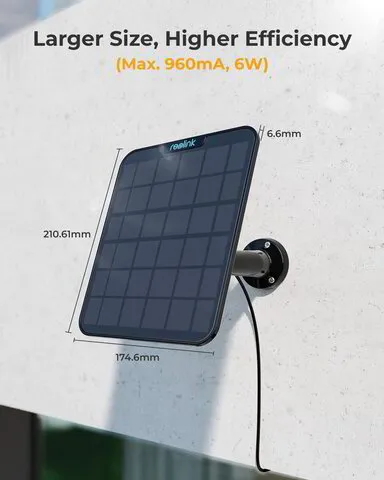
Larger size = 960mA & 6W means more power & more efficiency.
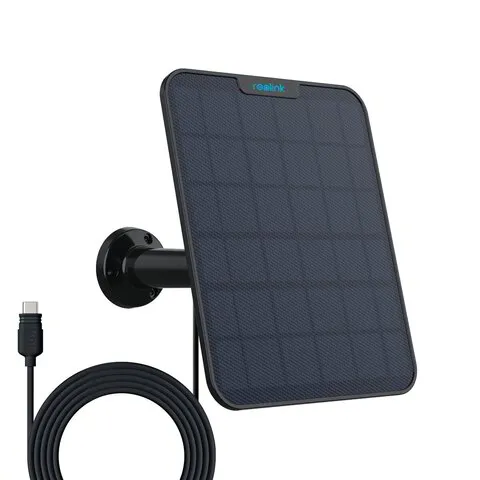
Connect your Reolink solar powered camera to this solar panel with a 4 metre connection cable (included) to get non-stop power.
The 360° wall mount allows you to easily position the weather resistant solar panel and ensure that it's perfectly positioned to maximize sun light exposure.
Huge savings. Provides Non Stop Power To All Reolink Battery Cameras
BEST PRACTICES & INSTALLATION TIPS WHEN INSTALLING SOLAR PANEL
Please watch short but useful video below on how to best install Reolink Solar Panel
Always try to install panel as North facing as possible to maximize exposure to sunlight
Avoid a completely horizontal angle to ground to avoid accumulation of dust & dirt
Always install panel in a portrait position & try for a 45 degree angle to maximize charging
Check your panel regularly for any dust & dirt & clean surface when needed
Avoid installing panel near tall buildings, trees or any object that will cast shadow over panel
To ensure weatherproof rating of panel, always fasten protective cap over camera charging port
WATCH: INSTACAM REOLINK SOLAR PANEL UNBOXING VIDEO TO HELP INSTALL PANEL IN A FEW MINUTES